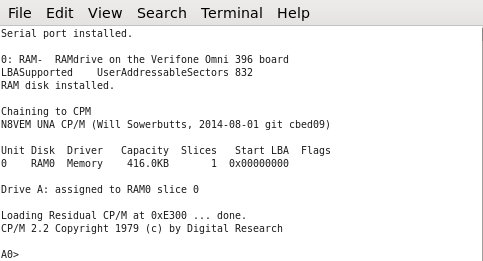
I loaded a disk image from the MultiComp project containing a large number of CP/M based programs.
I uploaded the remap command from the UNA CP/M system and mapped the appropriate slice into one of the drive letters.
I changed the system to the correct drive, and ran zork1.com. The results are shown above.
This project turned out to be a big hit at VCFMW, with a number of people sitting down to play Zork or other games on the system.
As I looked at the timestamps on the files and reviewed the process, I was surprised to see that I ran my own firmware only a month after purchasing the device. I was able to complete the entire system as displayed in only two months, which included the time waiting for the MicroSD adapter cards.
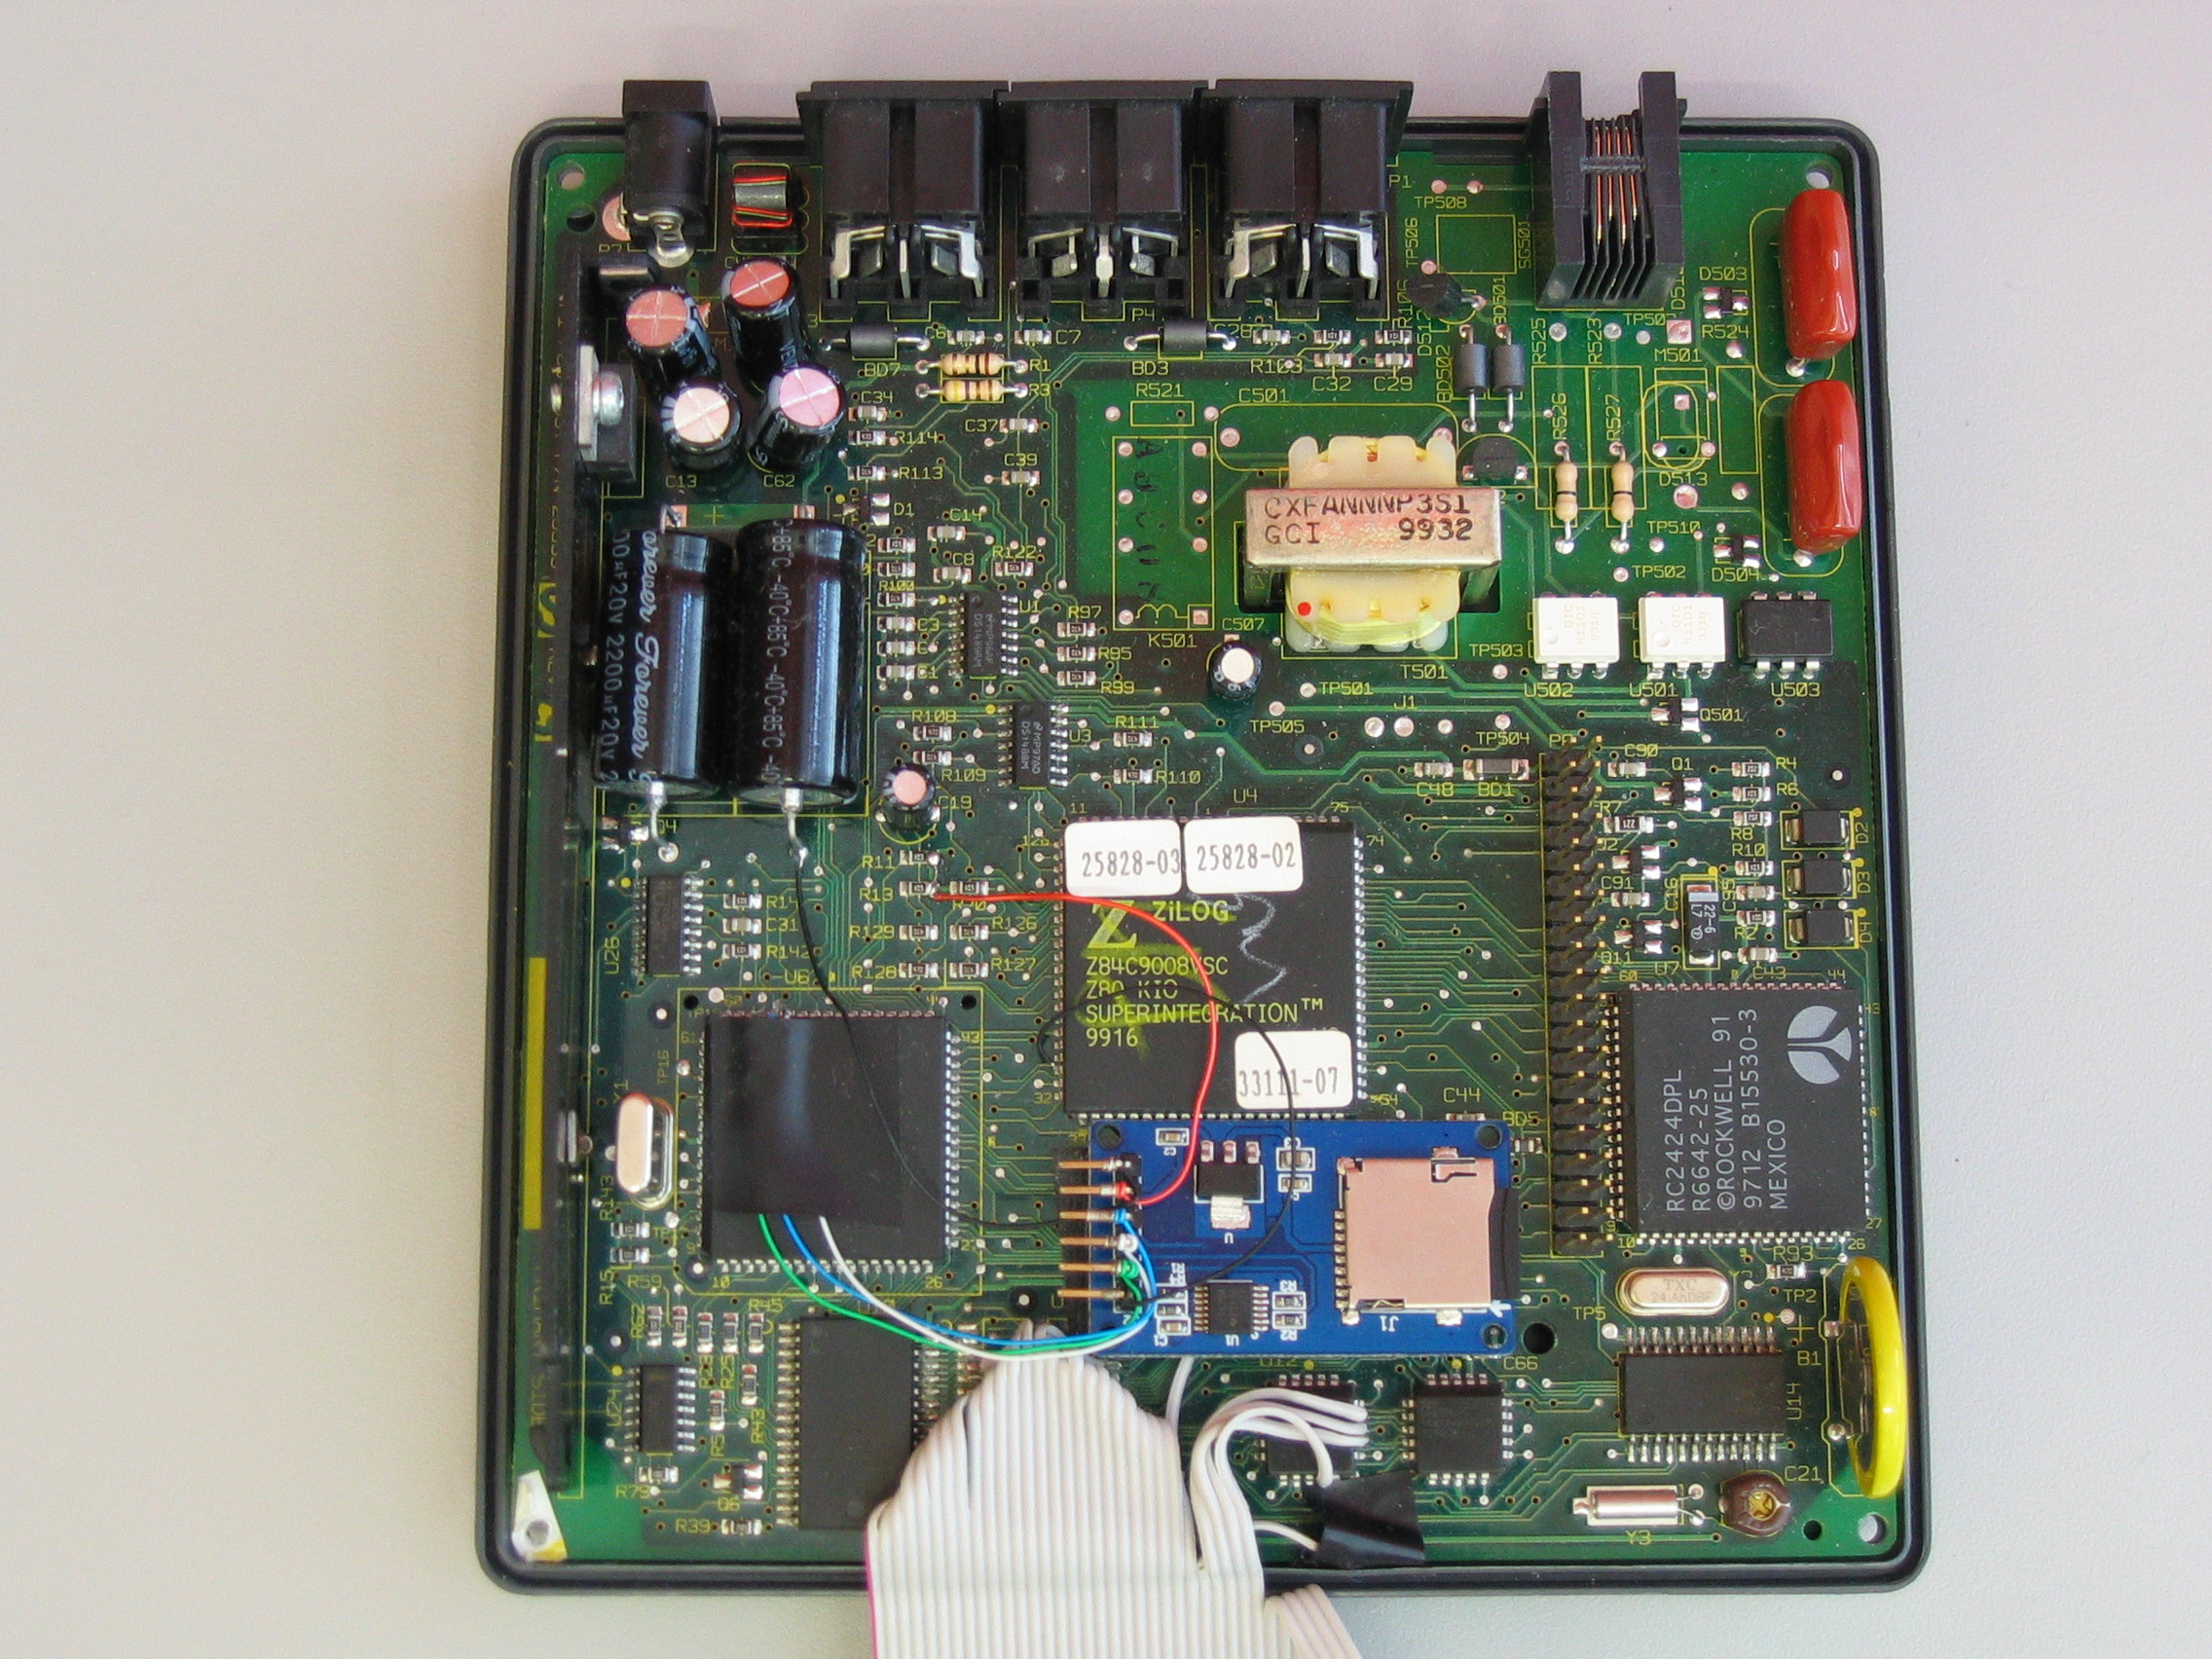
The Mark IV project has an SD card slot available as part of the design. The designer used the SIO (clocked serial I/O) port of the Z180, which allowed users to connect directly to the I/O pins of the SD card installed on their board. A bit of logic for card detection and selection and they have mass storage available.
I wondered if the same thing could be done with the credit card reader. I carefully traced the SIO pins on the credit card terminal, and found that only the receive line was connected. As should be done in good designs, the designers connected the input pin to ground. I needed one more pin to select the MicroSD card, ensuring that I could properly communicate with it. I continued my search tracing various pins on the board and found one that looked promising.
Along with the Z180, the credit card terminal uses a Zilog KIO, which supplies it with an extra pair of serial ports. I discovered that one of the output control signals was not being used and could be used as the MicroSD card’s select signal.
I purchased the appropriate adapter board for the MicroSD card, ensuring that the correct voltage level shifters were installed. Then, I carefully cut the one trace on the board, and soldered the required leads to the adapter.
With a slight adaptation of the UNA BIOS initialization routines, the firmware was now correctly accessing a MicroSD card.
My CP/M credit card terminal system now had 512MB of additional storage!
With the test routines operating correctly, the next step was to actually load the full N8VEM UNA BIOS onto the credit card terminal and launch a more useful operating system.
This was slightly complicated by the fact that while the terminal has 128K of Flash memory, only 64K is available to be loaded by the start-up firmware. Additionally, while the terminal has 512K of battery backed SRAM, the start-up routine writes to the first page before launching the operating system firmware.
For the first issue, I had to pack the UNA BIOS, CP/M, and a small CP/M disk image containing a file transfer program into the 64K flash image. One of the early steps of the firmware is to extract these various pieces into the correct place in RAM.
For the second issue, I took advantage of the ability of the UNA BIOS to map memory using the MMU built into the Z180. I simply shifted the first page such that it became the high page for CP/M. This page is overwritten when CP/M is loaded, which means that the start-up firmware is free to scribble on it without affecting the RAM disk.
As CP/M only requires 64K, and the UNA BIOS uses another 32K of RAM, I was left with enough room to create a small RAM disk. The extraction routine examines the beginning of the RAM disk and if it appears to be invalid, formats it and then installs the file transfer utility.
Using this, I am now able to transfer files to the system, and have a fully operational CP/M system.
However, X-modem transfers are a bit slow, and while I had enough room to run Zork, I could use a bit more disk space. The Z180 has a feature that would allow me to add something extra to the credit card reader.
I needed a simple program to send hello to the world and indicate that my code was operating in place of the original Verifone terminal.
I searched online for an open source project working with hardware similar to my own. Fortunately, the N8VEM project is working on just a system, called the Mark IV.
Even more fortunately, their basic test routines had been recently uploaded. After reconfiguring the I/O locations to match the credit card terminal, and implementing a bit of slight of hand to ensure that the firmware matched the critical signature bytes of the original, I was ready to upload it to the terminal.
While running my program, I watched as the terminal counted the blocks my program sent to be stored in the flash. After a few reset and adjustment cycles, I was able to connect a terminal program to the credit card terminal and observe the test routine’s output. I had succeeded in running the test code, as I observed the “Hello World!” output on my screen.
This had been a lengthy process, but I wasn’t done yet. I wanted to run a real operating system on it, and most of all, run Zork!
Now that I had reached the upload/download prompt, I needed to configure my laptop to receive the current firmware from the credit card terminal.
This step involved carefully tracing the start-up firmware of the credit card terminal. At the same time, I was building a program to send the responses required to emulate another Verifone Omni 396 waiting for a new firmware image.
Once the download protocol was documented, the process was reversed. At first, I wrote a program to send the same firmware back to the originating terminal. I could do this by just sending back the data I had just captured.
However, to send my own firmware, I needed to calculate the correct checksums for each packet, and the final checksum for the firmware CRC for it to activate.
Fortunately, the packet checksum was the common Verifone standard checksum used by previous products. Calculating the firmware checksum was a simple sum placed into the correct position in the firmware.
Now, I had the ability to reprogram the unit, but what to program as a simple test case?